
MINI BIG RIGS – Front suspension installation
Now we have a strong, straight and true chassis, it is time to begin the running gear installation, starting at the front end.
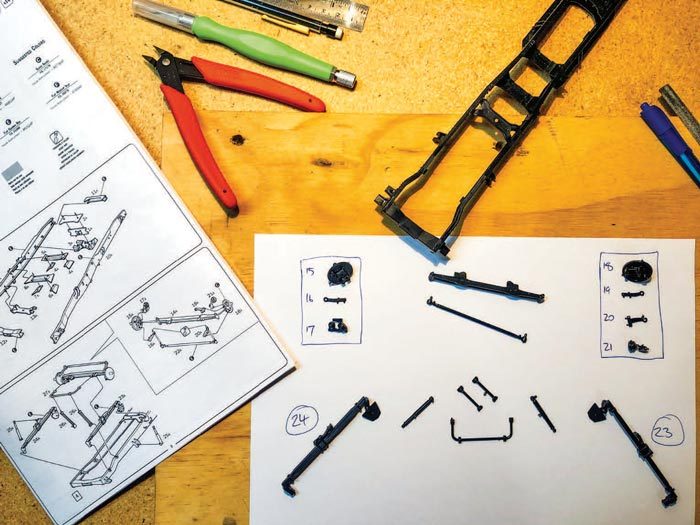
Photo: Identifying the required parts and laying them out on a sheet of paper with their reference numbers will save you from any possibility of confusion while assembling.
This month we move on to step 2 and start installing the running gear. Again, as we did with the chassis build, the first task is to identify the parts required on the sprue, carefully cut them free, and lay them out in order as per the instruction sheet. I find it helpful when completing a step like this to draft up a sheet of paper where you can lay out the parts in their assembly groups. This is especially helpful when you have left and right specific parts that look near identical. In instances like this, write down their corresponding identification numbers; this way you eliminate all possibility of confusion when you are halfway through applying glue.
As I mentioned previously, you will find that the moulding process sometimes leaves a raised ridge/mark on the parts that I feel needs to be cleaned away. It is not critical to clean these moulding marks, however a little time spent here results in a more realistic finish when the model is painted. To clean away these moulding ridges/ marks I use a mix of a very fine file as well as a fine grit sandpaper. Take your time and gently work at removing these imperfections, as you do not want to grind away excessive amounts of plastic.
You will see on the instruction sheet that step 2 is broken into two stages. The first stage is to fully assemble the front axle. The model is designed to have working steering to add to its realism, so extreme care and patience is required here when applying glue so that you do not accidentally bond the steering in a fixed position for all eternity. The next item to be installed is part 22A, the tie rod; this again requires a little care and patience. This part is not glued. Instead, as you will see on the instruction sheet, the pins on the tie rod ends are inserted into place, then the ends of the pins are ‘mushroomed‘. This is achieved by heating the tip of a small fine blade screwdriver or the like with a candle/lighter etc.
While hot you use the very end of the screwdriver blade to gently but quickly burr over the pin to resemble a mushroom top. If done correctly you will now have a working steerable front axle. Now for the easy stage of step 2 where we bring all the parts together by first fitting the front springs to the chassis. Once these are set in place we can install the completed front axle assembly onto the springs, along with the sway bar and shock absorbers. At this time before the glue sets, check that the axle is seated correctly and is square with the chassis rails. It is easy to make a tweak now if required, however it is an Italeri kit, so rest assured it will fit. Well, there is the first half of our running gear in place, next time it is on to the rear bogie installation.

Photo: Cleaning the moulding ridge marks from the parts before assembly makes for a clean finish, especially once paint is applied.
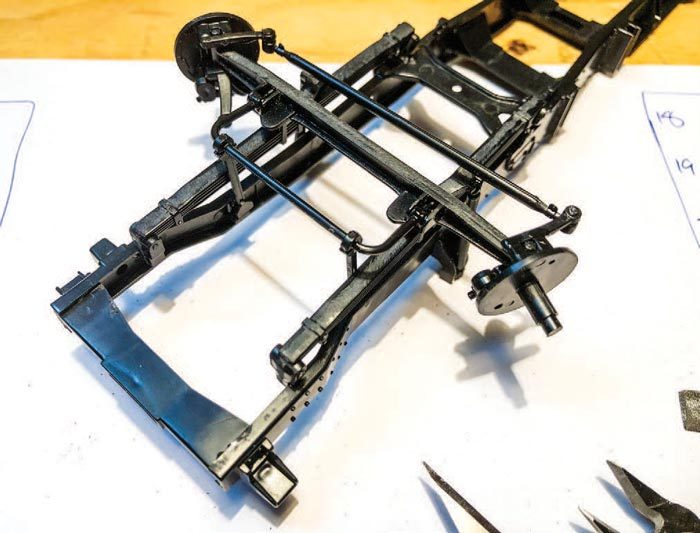
Photo: The completed front axle and suspension installation, complete with working steering.
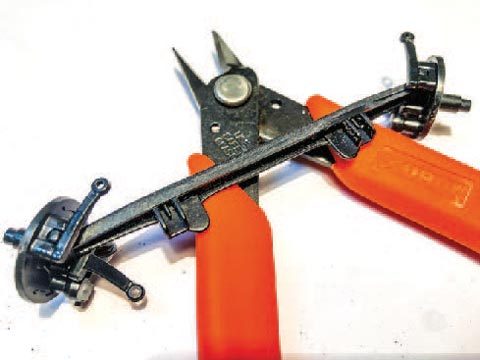
Photo: Take your time and be careful when applying glue near the moving parts, this way you will retain the working steering feature of the model.

Photo: Our subject matter, Pilkington Automotive Glass Ken Kirk circa 1992.
![]()
![]()
![]()
![]()


