40th Anniversary Project – Torquing Bulldog – Stage 5 – Talking Tralilers

With the chassis of Torquing Bulldog now complete and ready for paint, it’s time to focus on making a start on the trailing gear connected to the Ringfeder at the rear of the truck.
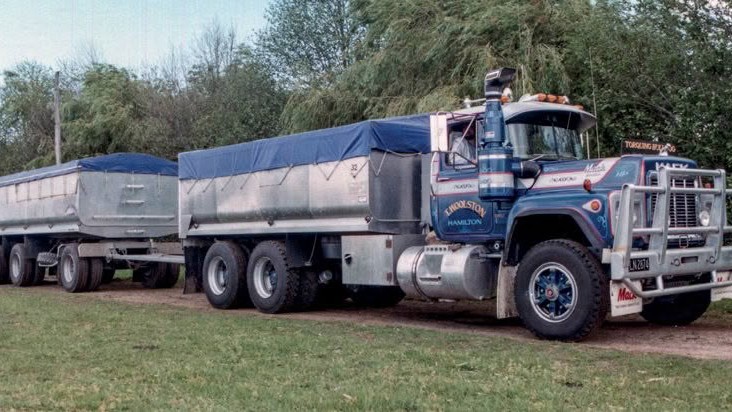
When we embarked on the journey of building Torquing Bulldog, we were under no illusion that we would need to attempt a good deal of scratch building. The base kitset of the R-model Mack is not too much of an issue; that is purchased off the shelf at most local hobby stores. It is when we start looking at the trailing gear that Torquing Bulldog towed – the three-axle 1.8m spread spaced tandem, alloy-binned tipping trailer – that we begin to understand the task ahead of us.
Unfortunately, the international kitset manufacturers do not cater for New Zealand trailer configurations. The market is too niche for them, not to mention the plethora of combinations and configurations that we have here. So apart from a second-hand set of wheels I robbed from the spare- parts bin, the entire trailer from tow-eye to taillight will be scratch-built from various Evergreen plastic sheet thicknesses and extrusions. As we have found with past projects, the Evergreen product is easy to work, form and glue.
The first step, and by far the most important stage of a build like this, is the research. Straight up, the quality and realism of the end product is directly attributed to the amount of time spent here, acquiring as-built information and correct measurements. This is where belonging to a model truck club, and having a bunch of like minded model truck building mates at the end of the phone you can call upon to help you out of a bind, is extremely helpful. This time good friend and committed model truck builder Gordon O’Riley came to our assistance with all manner of photographs, as well as his own hand-drawn blueprint schematics of the exact trailer we are needing to build.
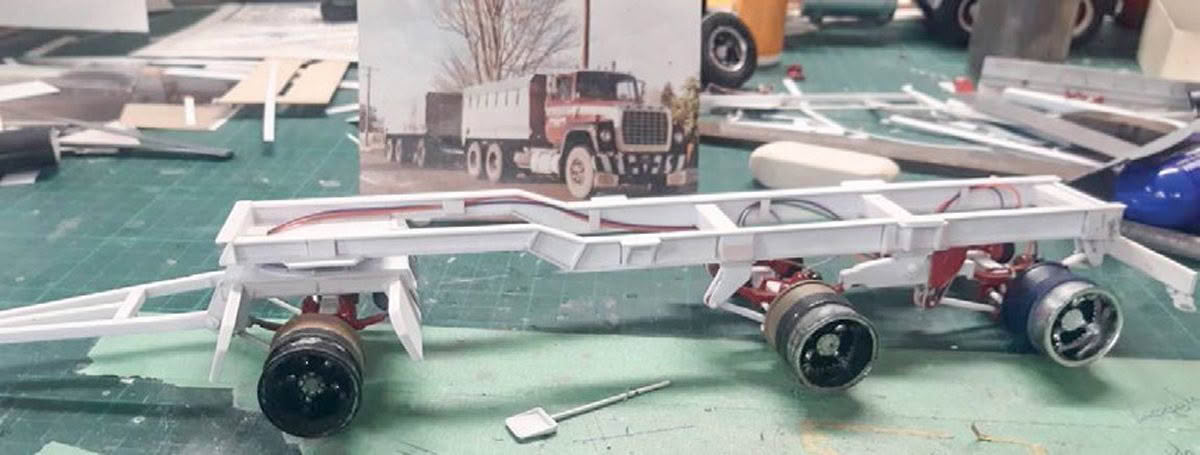
Armed with this information we can make a start. And just as if we were building the trailer at 1:1 full-size scale, we apply the exact same building techniques to our 1:25th scale model, and start with the chassis. This is as simple as forming the two chassis rails first from Evergreen 279 9.5mm I-beam extrusions.
And with that we are under way.
Using Evergreen 1.5mm sheet plastic, cut to shape and form a simple box to replicate the driver’s side toolbox on Torquing Bulldog. Once dried solid you can file the edges clean, then add door details like the handle and hinges.
Exciting times, as our parcel from the team at Auslowe Model Accessories has arrived. Inside are all the goodies we require to get Torquing Bulldog as close as possible to the real truck. The detail found in the Auslowe castings is second to none; they absolutely pride themselves on accuracy. Their catalogue is extensive; I seriously recommend you visit their website and see for yourself just what they have to offer. Great people who are as passionate about the hobby as we are. Here we see their air reservoir tank for the starter motor (Auslowe AT3), complete with chassis mounting brackets and straps. As I mentioned above, great people who offer us builders solutions that take the realism of our builds to the next level. Visit them here – www.auslowe.com.au.
The weapon of choice when Torquing Bulldog was new, a three-axle 1.8m spread spaced tandem, alloy-binned tipping trailer. Definitely not available off the shelf, apart from the wheels and tyres, this build will be 100% scratch-built.

Armed with all the measurements and information we could wish for, we cannot thank Gordon O’Riley enough for his hand-drawn blueprints of the three-axle trailer, as well as photographs of one of his own builds (top) to guide us. This information and detail has taken all the guesswork out of the build for us, and will most definitely take the level of finish and realism to the next level.
Starting at the beginning, the first stage is to form the chassis rails. We do this by using Evergreen 279 9.5mm I-beam extrusions, cutting the rails to length and forming the first angle cut that leads up to the ball-race turntable – bring it on, we are under way!


